Top 5 Tips for Sewing Perfect Chasuble Orphrey Bands
Top 5 Tips for Sewing Perfect Chasuble Orphrey Bands
How often do you look through Church Vestment Catalogs or at Vestments online and think, “If only I could make a chasuble like that! It can’t be that difficult, but those bands on the back look so complicated. How could I ever get them to turn out correctly? Amid these thoughts and aspirations here are the Top 5 Tips for Sewing Perfect Chasuble Orphrey Bands.

At first glance, a chasuble with bands all over it might look a bit intimidating to create. Sometimes one does not even know where to begin to create a chasuble project like this.
Sewing can have many levels. There can be garments that are quickly slapped together and they usually look it. Some projects take lots of time, but perhaps there is a bit of inexperience or lack of knowledge on the part of the seamstress. All of the parts may be sewn on the garment, but the finished piece looks a bit wonky – the seams might be crocked, or the orphrey bands might not be in to correct spot.
In the Ecclesiastical Sewing Studio, we too struggle with sewing issues from time to time. We are always seeking ways to improve our skills and move to the next level of workmanship. We love beautifully made vestments because they are used for sacred purposes.
Learning and Mastery in Ecclesiastical Sewing
I remember years ago when I took a tailoring class. We were required to padstitch the lapels and collar to create a truly tailored jacket. Instead of making one jacket which was the assignment for the semester, I created 3 tailored jackets that semester, much to my fingers’ dismay. When I finished my jackets, I took them to a professional tailor for a final press. I spent about an hour visiting with the tailor who was in his mid-70s. I remember him telling me that the more time he spent working with fabric, the more he realized what he didn’t know. He had learned much and had a great deal of skill and mastery, but he knew that learning never stopped. Each garment presented different circumstances and challenges, and the key to being successful at what he did was to continually analyze each piece and look for even the smallest way to improve on the next project. Now, 30 years later, I find myself doing that with each project that comes through the Ecclesiastical Sewing workroom.
Chasuble Orphrey Bands
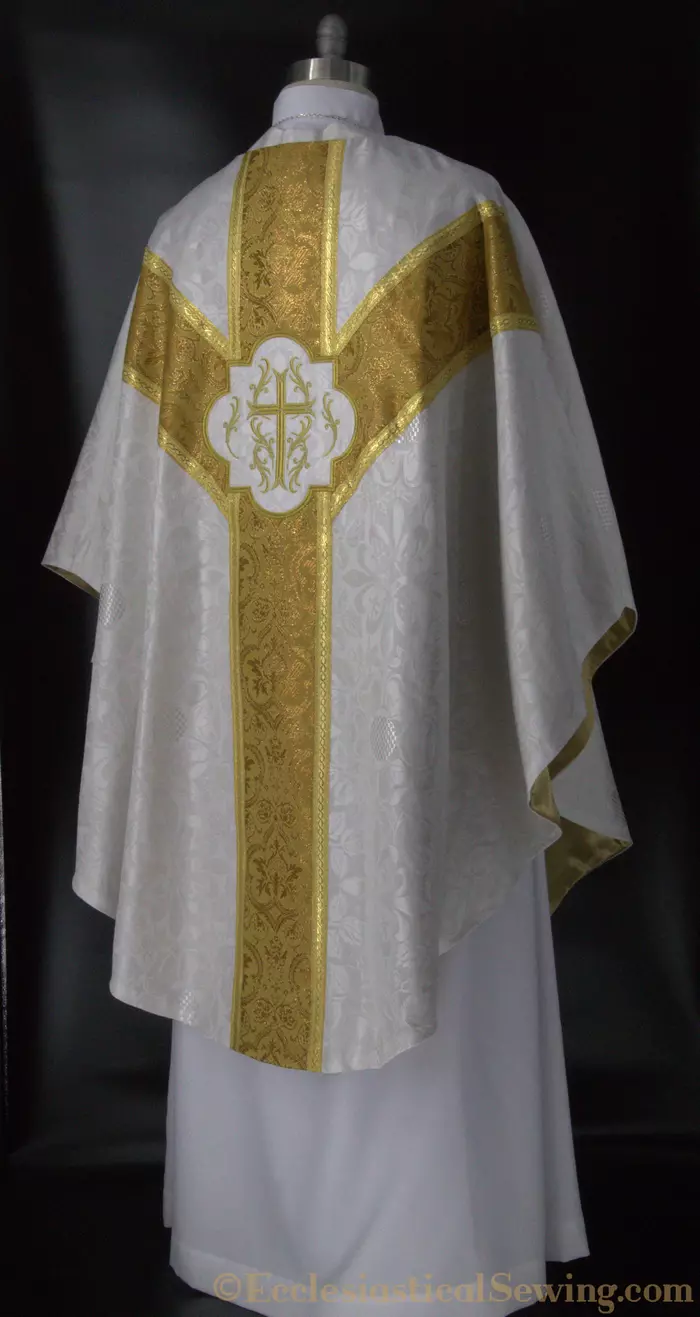
To better help those of you who are interested in creating your own chasuble using our Gothic Chasuble Pattern, I thought it might be helpful to provide a few tips so you can create beautiful “Y” orphrey bands on your projects.
There are some common questions that my students and readers often ask, “How do you get the bands on a chasuble to be even?” and “How do you get the side pieces to line up?” and another question: “How can I sew the trim so that it is straight?”
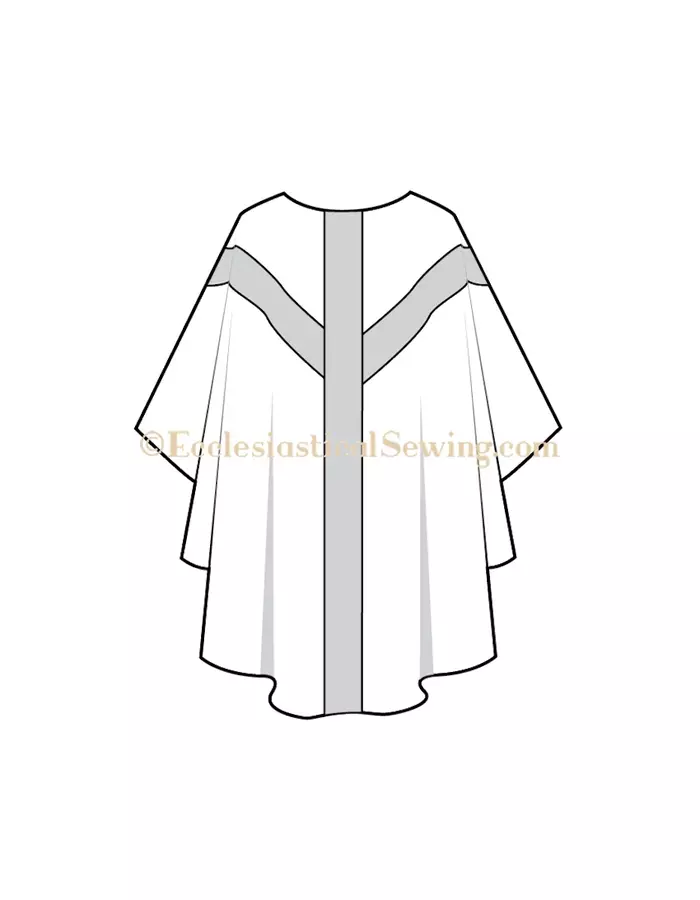
So let’s get started and work down the list of questions and provide a few tips so you too can create beautiful “Y” orphrey bands on your chasuble.
Tip #1. Sewing Perfect Chasuble Orphrey Bands: Select the Right Marking Tools
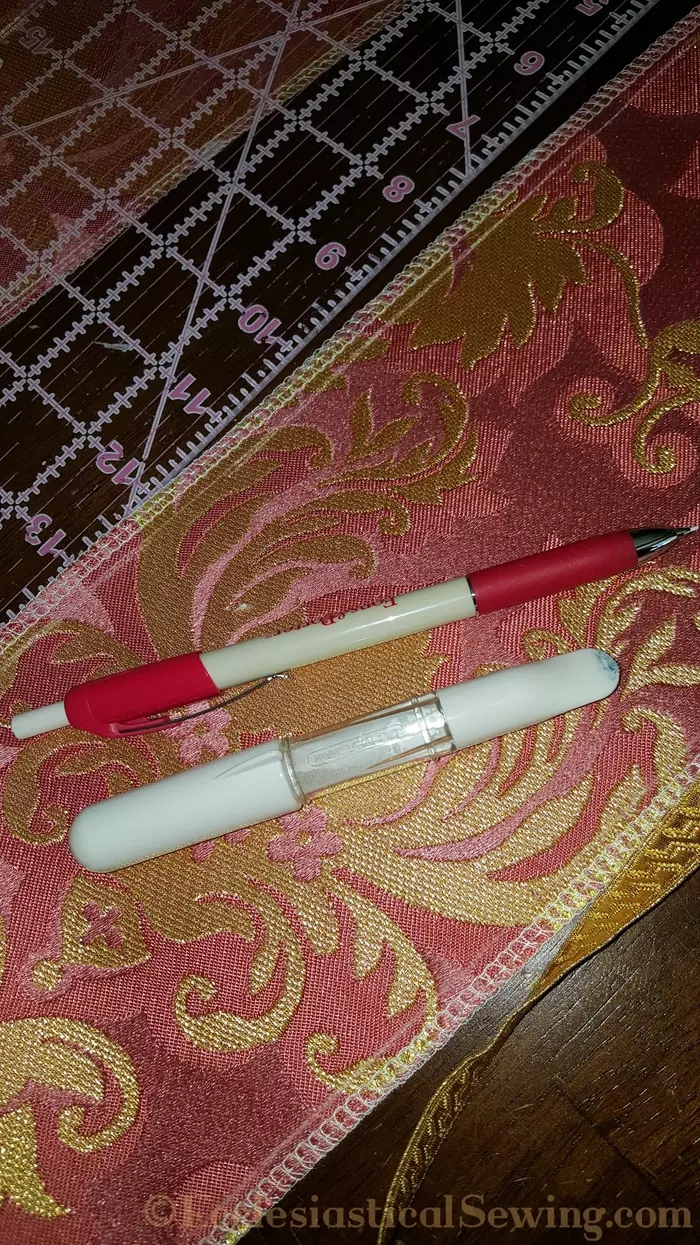
Fons and Porter marker
When it comes to sewing tools in the Ecclesiastical Sewing Studio, I tend to be a minimalist. I search around for what is needed, select a few things to try out, and then pick the best one or two items that fit our needs. When it comes to marking many of our fabrics, there are several things we NEVER use. Those would include the blue washout markers and the purple air-disappearing markers. These items are banned from our studios. Instead, we prefer to use something that will brush off with fingers if needed, or simply brush off with a bit of handling while sewing seams. Two favorite items that we use are the Fons and Porter Marking Pencil and the Chaco Liner. The Fons and Porter marker creates an important fine line. The finer the line, the more accurate we can be when matching and aligning different parts. The Fons and Porter marking pencil is like a mechanical pencil. It has a fine lead insert that is available in several colors. At the moment, we only have white, but we will be testing out some of the other colors in the future. The pencil lead can be increased with the push of a finger, just like a mechanical pencil. It also has an eraser. We don’t need to use that much as we are usually able to brush the line off if needed. The pencil can be run along the edge of a ruler. The mark is sometimes a bit light but is usually visible. On occasion, it may need a second pass to create a line on fabrics that have a heavy pattern. I would recommend caution pressing over any marks made on liturgical fabrics for fear that the mark may become set with heat.
Ruler and Chaco tracing wheel or marker
The next two items go hand in hand. The first is the Chaco marking or tracing wheel, and the second is a 24-inch long quilting ruler. In our studio, the one is rarely used without the other. When I reach for the Chaco, the ruler comes out of the drawer at the same time. The Chaco marker has a hollow tube that is filled with a marking powder. The powder comes in several colors. We have had good success with the blue and white colors. The yellow and pink we use with caution. We have also used a grey Chaco with some success. The Chaco has a little tracing wheel at the end of the tip. The flat side of the marker is placed along the edge of a ruler. It leaves a fine thin line that is clear and visible. The powder does brush off some fabrics. But be careful to not use heat, or the mark may set and not come out. We do use an art eraser on occasion to remove a mark that was made in the wrong place.
Tip #2. Sewing Perfect Chasuble Orphrey Bands: Finish edges of the Orphrey band.
This one is almost a no-brainer. Many of the church vestment fabrics (like other fabrics) will ravel. So don’t be surprised. These fabrics are created with amazing weaving patterns on jacquard looms. Often the yarns have to float over several warps at a time instead of being a plain weave that just goes over and under. Some of the yarns are silky, shiny, thin, or thick. Some fabrics seem to ravel at a touch, while others hardly ravel at all.
But regardless of the pattern, we must face the fact that fabrics will ravel and they need to have some sort of finish to prevent unraveling. The simplest way to finish a seam or fabric edge is to use a serger. Most sergers use either a 3-thread or 4-thread stitch to finish the edge. On a 3-thread serge, one needle creates a line stitch, while the other two threads are on an upper looper and a lower looper. The loopers come up over and go under the fabric creating an edge stitch or finish as they combine with the straight stitch. A 4-thread stitch works the same way, but it has two needles and makes a slightly wider serged edge. Whenever possible, I prefer the use of a 4-thread serger to finish the edge of church vestments. The reason is that the wider stitch bites into the fabric just a bit further which helps create a firmer finished edge that is less likely to pull out.
Think of this serged edge as you would the foundation of a house. If the fabric edge finish is not finished, trim could pull away on bands and bands could fray out.
If you do not own a serger, you can use a zig-zag stitch to finish the edge of orphrey bands. You might also check out some of the other stitches on your sewing machine. There may be an overcast stitch or an edge finish stitch. Test these options out and find one that will work. One tip is that often the machine tension on these stitches is too tight for our liturgical fabric, and it might need to be loosened.
The other reason to edge finish orphrey bands is to prevent stray yarns and fibers from sticking out from under the trim.
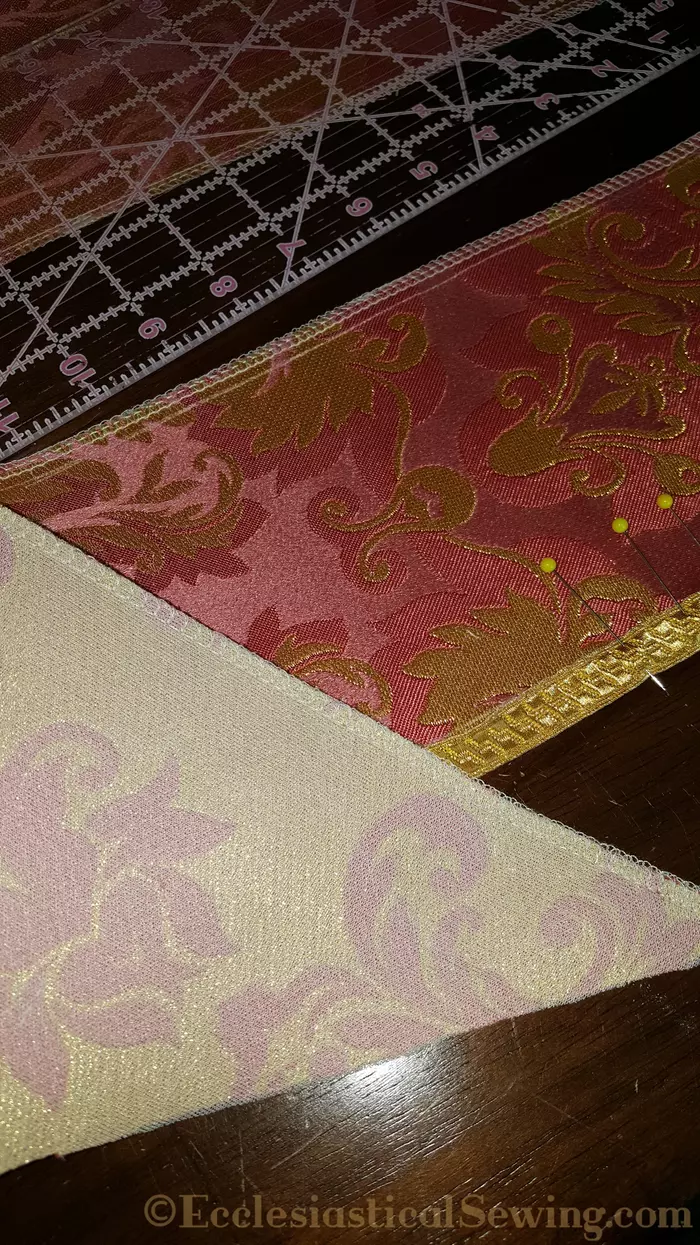
Tip # 3. Perfect Chasuble Orphrey Bands: Carefully mark placement lines and pin them accurately.
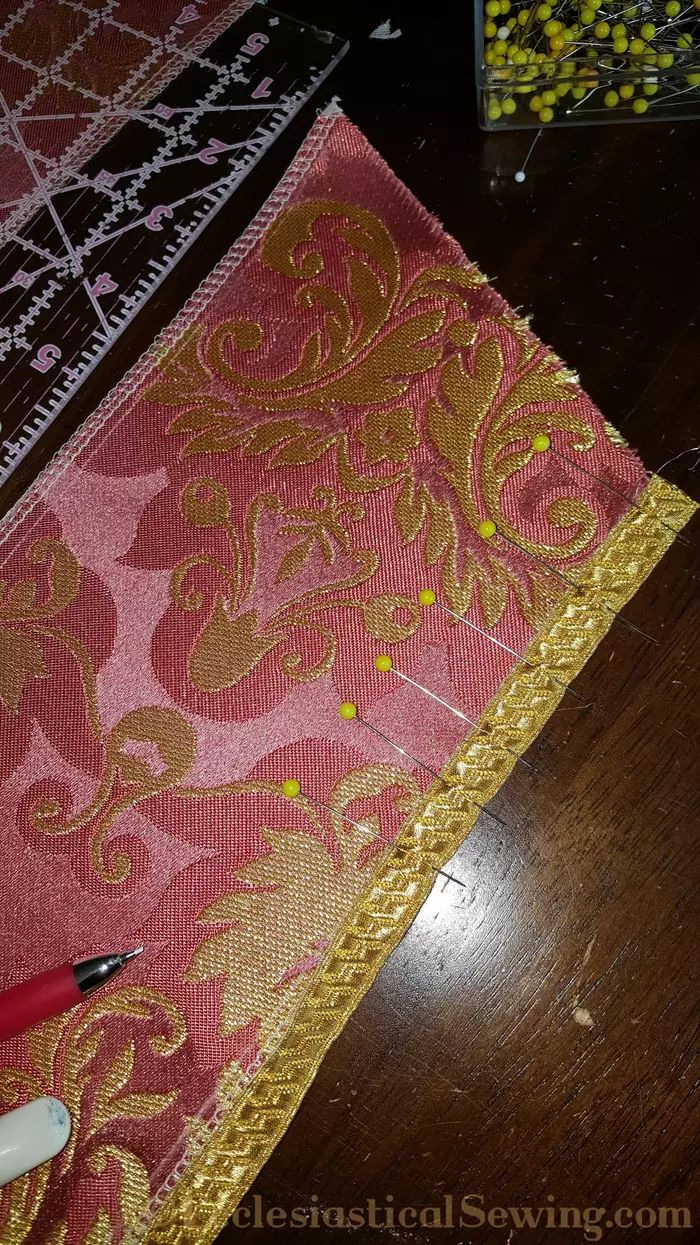
Once your orphrey edge has been serged or edge finished, carefully use your marking tools and draw the finest line that you can still see and that will remain until your trim is pinned. Students often try to draw a line using a piece of tailor’s chalk or some other bulky marking tool. But we are working with narrow trims and a narrow edge of the fabric. When we are using a trim that is only 1/2″ wide, the mark needs to be no further than 3/8″ from the edge of the fabric. It should not be any closer than 1/4″ from the edge of the fabric. The placement line needs to be precisely placed so the trim is sewn solidly on the fabric. And nothing should show underneath on the opposite side.
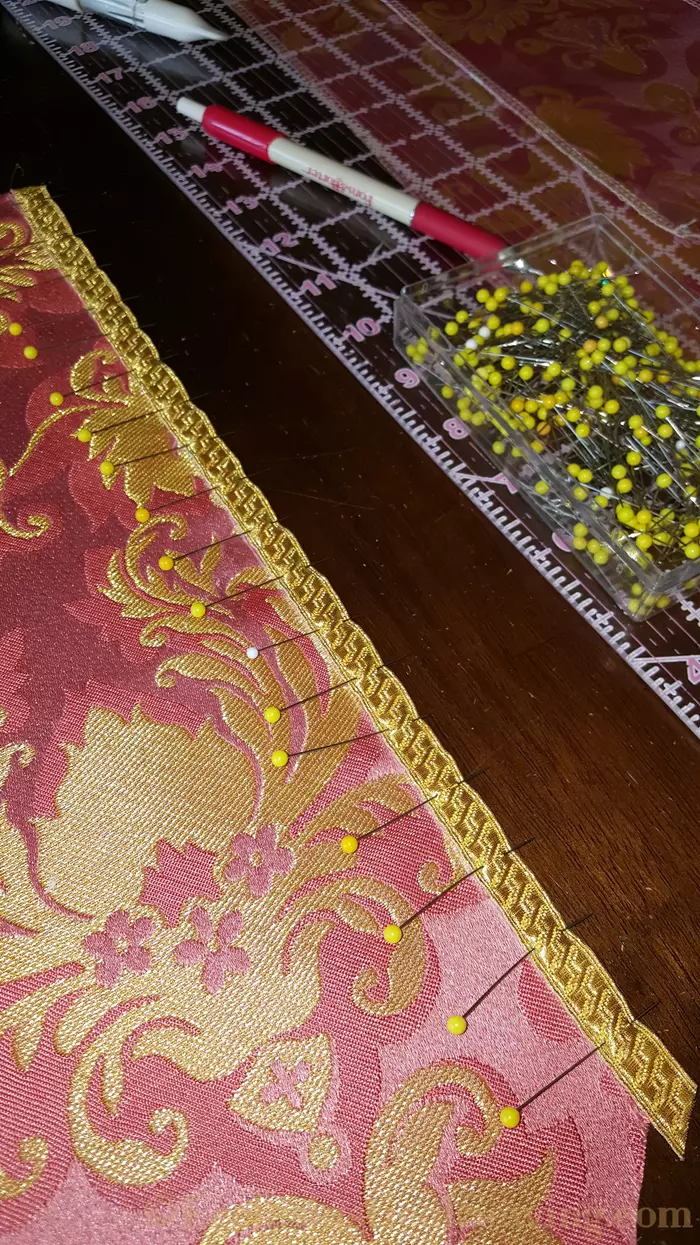
Pinning the trim in place is often a challenge for my students. If you only take away one thing:
Remember to place your pins perpendicular to the trim and fabric.
If your pins are placed at an angle, the trim will shift and pull and you will end up with puckers. Notice also how closely spaced the pins are? The reason – if the pins are placed close, and the trim is exactly on the marking line, there is little chance that the trim will end up with waves or be uneven. Take your time with pinning and pin as accurately as possible. Your prep work will a large part, determine the final outcome of your trim.
Tip #4. Sewing Perfect Chasuble Orphrey Bands: Sew using the edge foot
Sewing machines come with lots of gadgets. Take a few moments to look through the extra feet that came with your machine. Locate the edge foot.
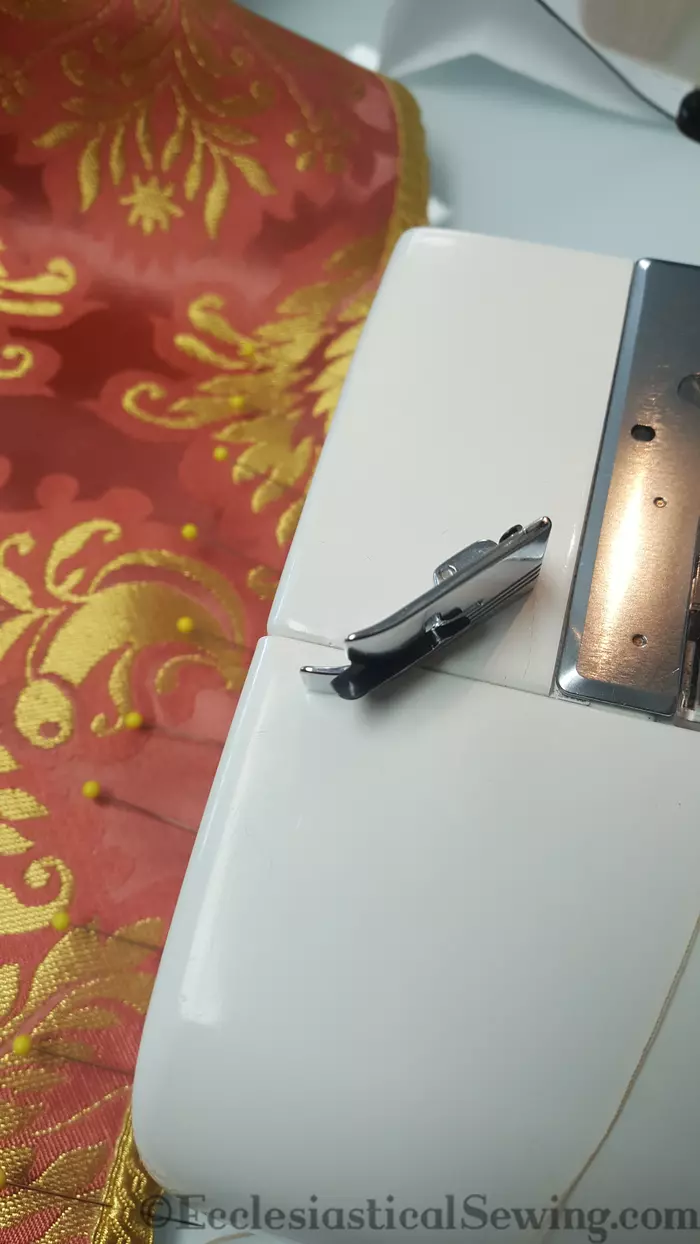
It has a little black straight edge on the bottom of the pressure foot. The machine needle can usually be positioned on the left or right side of the foot. Use your edge foot as a guide when sewing the trim. Place the trim along the edge of the foot. Check the needle position so that it stitches about a scant 1/8″ from the edge of the trim. Using an edge foot will help ensure that your stitching remains straight and even that the trim is caught in the stitches. If your stitching takes a “vacation” and gets off track, simply stop, back things up, and restitch. When you are finished, take out the few stray stitches. All will be well in the end.
Tip #5. Sewing Perfect Chasuble Orphrey Bands: Spot-check that the trim width is even throughout
Once you have finished stitching all of your trim in place on your orphrey bands, and all of the pins are removed, take a few moments to look at your project. Place the band on your work surface and look at it from several angles. Ask yourself if you notice any place where the trim wavers or where it might not look perfectly straight. Are there any places where the trim looks closer together in some spots and further apart in others? Are there any places where the trim or fabric looks puckered?
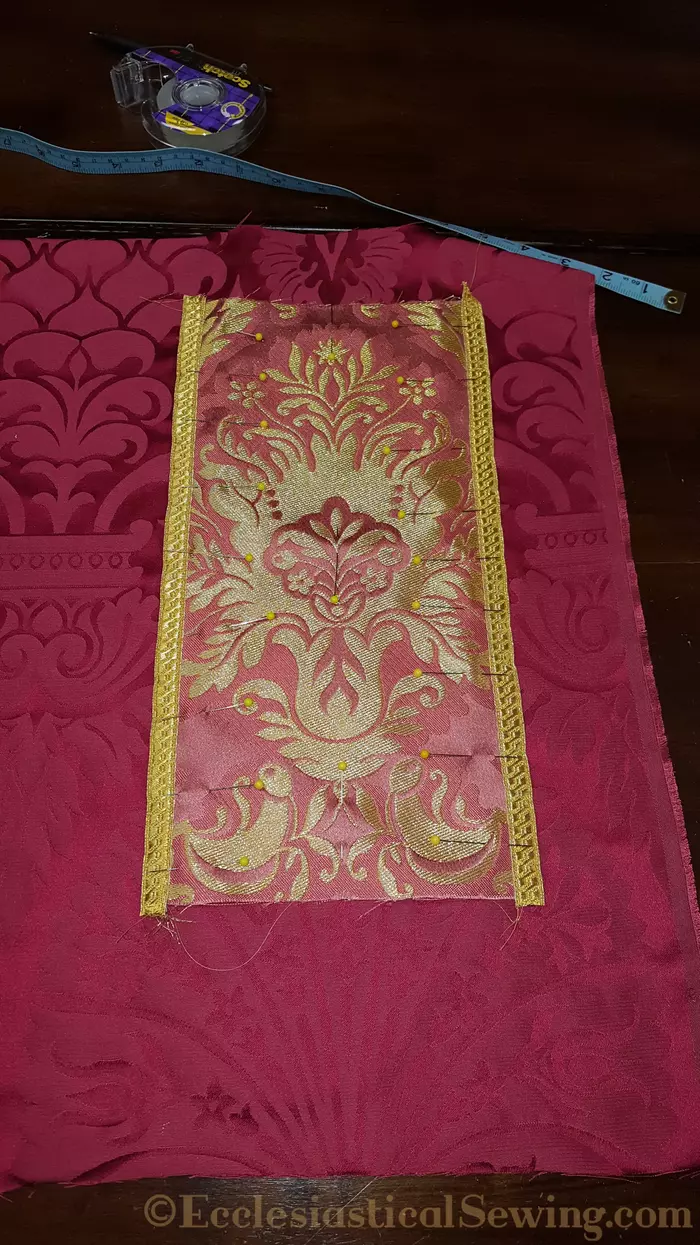
Next, take a ruler and spot-check measurements. Is the distance between two rows of trim the same as you spot-check? If you notice any areas that are not correct, place a pin or pins in the areas that need correcting. Take out any stitching, reposition and repin the trim and restitch. Then check again.
Many of our readers have been asking for more detailed sewing instructions, especially about making chasuble. This post about sewing trim on chasuble orphrey bands is helpful, even if it is a bit longer. We hope to continue this conversation on making chasubles soon.
Please let us know what questions you have about making vestments in the comments below. We hope to create a few video tutorials this summer and would like to better know your needs.
Thanks so much for following along as we work to recover the lost art of vestment making.
Soli Deo Gloria
The fabrics used in this project are the Rose colored St. Nicolas Damask and a special order Rose and Gold Brocatelle. The project is a bespoke Rose Low Mass Collection.
Stole Making: A Little Encouragement
Top 5 Pastor Stole Finishing Touches
Sewing Tips – Top 10 Scissors for all Occasions
Sewing Tips: What is needed to make a Tippet
Evangelist Stole for Easter Quick Ship
How to Cut Orphrey Bands
Quick Sewing Tip: Add Goldwork Dove Appliques to Red Stoles for Pentecost
Church Vestment Stole Patterns for Pastors and Priests by Ecclesiastical Sewing
Adding Fringe Trim to a Pulpit Fall or Superfrontal
Creating Orphrey Bands for Church Vestments
Sewing Church Vestments and Linens: 10 Tips for Success


 RSS - Posts
This was such an interesting read ! Your work is beautiful !