From Inspiration Source to Stitching
From Inspiration Source to Stitching
From inspiration sources to stitching into action is often a difficult thing when it comes to starting a new Ecclesiastical Embroidery project, especially if it is a slightly larger hand embroidery project. A larger hand embroidery project can entail size, technique, the design complexity of the embroidery pattern, and many more concerns. Taking those first stitches, however, and having them look well is a thrill!
Over the past week or so, I have been writing about the Easter Set Pulpit fall, the steps taken to get that framed up, and the design transferred using the prick and pounce method. So, here is a quick update on where the project is at.

Quarter Circle with Silk Embroidery
The background in the quarter circle surrounding the cross needs to be filled in with stitching. The silk embroidery floss used here is from Au Ver A Soie РSoie Ovale in Cr̬me Рusing a size 26 crewel needle. This is a flat silk and it works beautifully for this type of hand embroidery stitching.
The threads are stitched on the surface side only, going back and forth across the width of the area being stitched. Some of the stitches are not very long, but there is one side where the stitches run the entire length of the quarter circle. It takes a bit of practice using a laying tool to get the hang of straightening all of the fibers before pulling the embroidery floss to the backside.
The good thing is that for the most part, the area is not very large to begin with, so it has stitched up much faster than I expected for this one area.
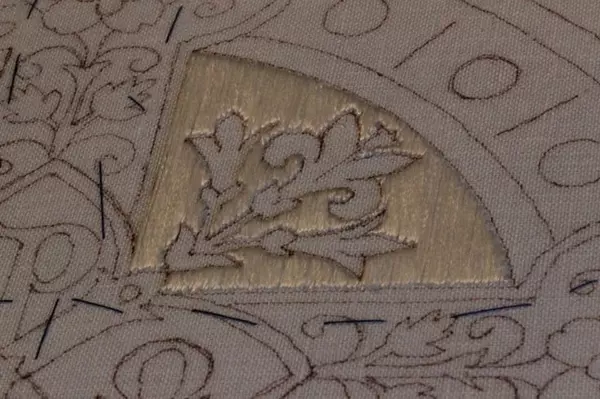
Flat Silk Embroidery
And here is the area completely stitched with flat silk. There are a few tiny imperfections if one were to look very close, but luckily, depending on the angle of the camera, the imperfections are not as noticeable.
There are a few little tricks that might be helpful if you would be interested in giving this a try. The first thing to remember is not to use a long strand of embroidery floss. I use a length that is about as long as my arm from fingertips to elbow. Next, when pulling the embroidery floss through the fabric, get in the habit of pulling the floss straight up or straight down as it goes through the fabric. Finally, use a laying tool of some sort to stroke the threads in the direction they need to go in as they are stretched across the width of the fabric and pulled to the backside. The stroking will straighten out any fibers that are twisted so that every fiber is smooth as it is laid down on the surface.
It is a relief to know that small areas could be done in this variation of the Italian hand embroidery stitch. What is next? Stitching down the silk with the goldwork couching to prevent any snags that would require repair. Well, I had better get back to stitching for now. Thanks for following along.
Solo Dei Gloria
Be sure to visit our online store front Ecclesiastical Sewing where you may shop for Liturgical Fabrics, altar linen fabrics, church vestment-making patterns, liturgical machine embroidery designs, church vestment trims, notions and so much more. You may also find us on Ecclesiastical Sewing on Facebook, Twitter, and Pinterest. Sign up for our mailing list at the bottom of the page on our online store front and receive a free copy of our Small Linens Booklet as our way of saying thank you for following along.
Inspirations for Silk Wrapped Purl
Easter Sunrise Hand Embroidery Design
Inspiration for a Lazy Sunday Afternoon: Small Altar Linens
Pastoral Stoles: How Much do They Cost?
A Little Splash of Color
Sources of Inspiration from Lucy Mackrille


 RSS - Posts
You must be logged in to post a comment.