Project Update: Rochet and Monastic Choir Alb
Project Update: Rochet and Monastic Choir Alb
Project Update: Rochet and Monastic Choir Alb:
Yes, Ecclesiastical Sewing projects are being worked on for our newly launched online storefront. They are just sooooooooooooooooo slow. With family commitments and a wedding looming soon, time is limited at the moment. There is also a hold-up at the moment as the result of a few church vestment patterns that are in the works that must be completed.
As I have been out and about this past spring and summer traveling, and through reader comments, the need has arisen to create several patterns for sewing various church vestments. With the weekend looming, I hope to finish up the pattern drafting, get the sample garments stitched, complete the necessary pattern grading, and have the church vestment patterns ready soon.
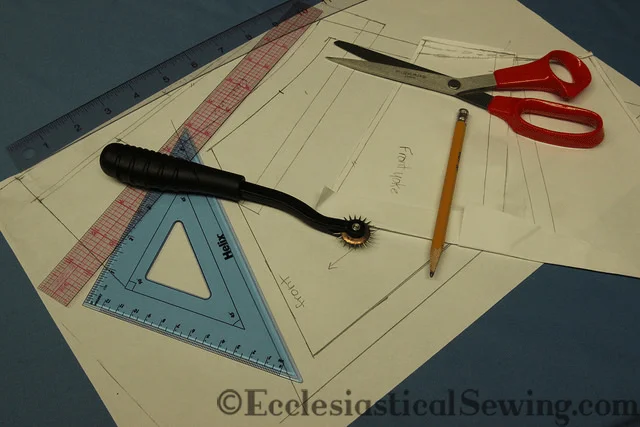
Block Pattern
You may be asking how one goes about drafting a pattern. The answer is anything but simple. The first step is to create a “master pattern” or a “block pattern” based on the desired measurements. Once a “block pattern” is created, it needs to be modified for the desired style lines. Several tools are indispensable for drafting patterns. A triangle is used to keep lines perpendicular. The tracing wheel makes for fast tracing when lines need to be maintained through several layers of paper. Gridded rulers are also a “must have” item to quickly add seam allowances.
The process of adding style lines to a block pattern is always a bit of a gamble. This is where things either work or completely fall apart. It takes years of experience, a bit of guesswork to know what to do, and sometimes trial and error to finally get the correct pattern. For those familiar with the process, there are two ways of going about making a pattern. The first is to utilize techniques of flat pattern, such as I am doing in the above photos. The other is to use a method called draping, which involves starting with a piece of fabric and pinning it to a dress form to obtain the desired result. Sometimes both methods are used, in that the garment starts with draping on a dress form.
When complete, the muslin is removed, and design lines are noted and corrected if needed. The muslin can be used to cut a sample garment, or the design can be transferred to paper, and a new fit sample is cut from the paper pattern. Depending on the project, I often combine elements of both methods to get a final result, or to fine-tune details.
Finalizing the Rochet Pattern
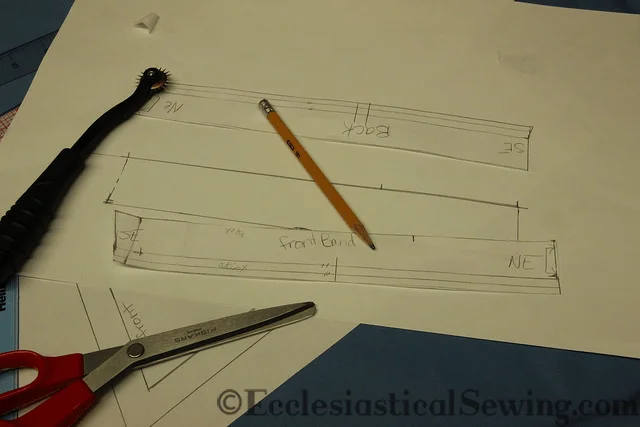
In creating the Rochet pattern, the design calls for a two-piece yoke with no seam at the top of the shoulder. The top yoke has to have enough length to fit smoothly over the shoulder. The yoke band has to hit at the precise height on the chest and back shoulders, being neither too loose nor too tight. Not to be forgotten is the challenge of getting the sleeve cap height correct, as well as the bicep width on the sleeve. If the proportions are off, the sleeve will bind, restricting movement.
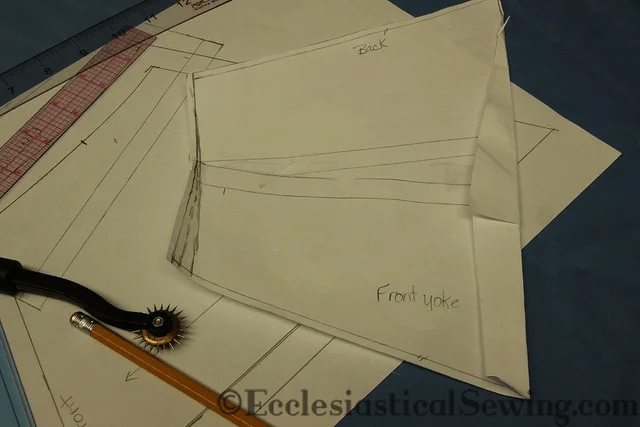
The skirt portion of the rochet was fairly straightforward to deal with, requiring minor adjustments for fullness. Once the first pattern is drafted, a sample garment is cut and sewn to check the fit on a dress form, as well as a fit model, and to check style lines. Sometimes everything works out perfectly the first time around, but more often than not, the garment can be improved with minor adjustments. Pattern-making is not a process to rush. It may take several tries, with fine tuning along the way, before the garment goes from being acceptable to being very nice. Additional changes are noted and made to the pattern. Then it is time to finalize everything in the pattern.
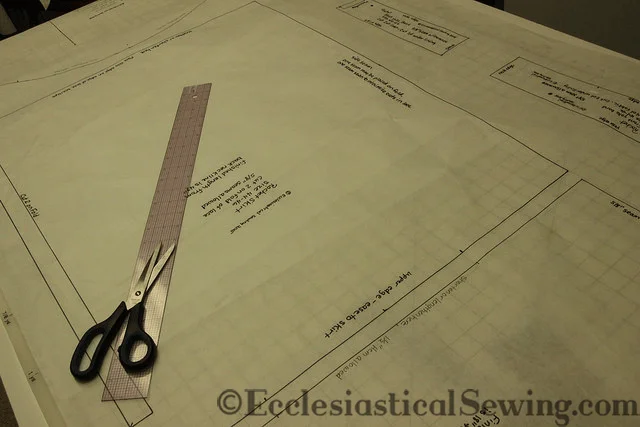
Once the final changes to the design lines are completed, the pattern needs to be cleaned up. Seam lines need to be checked to ensure they are the same length. A seam allowance needs to be added, as well as any notches or reference marks needed for construction. The final step is to label the pattern. The next step is to cut and sew a final sample to ensure that all of the changes work, that construction techniques work, and to check fit one more time. That completes one size in a design. But what about the other sizes? They either need to be created from a block pattern, or graded from the original pattern. The verdict is still out on a decision on grading or creating a new pattern.
Pattern Development for Monastic Choir Albs
Similar steps were taken to create a series of Monastic Choir albs. The patterns are soon to be completed and will be available in sizes X-Small to X-Large. Currently, the monastic choir alb has a V-back cowl collar. However, a hood will also be created for the monastic alb in a few weeks. The next step is to source appropriate fabrics for the alb, make samples in several sizes to check fit and style on additional pieces from the graded pattern, and get photos of the finished garments. Then there is the writing of instructions and taking photos at various points during the construction process. Last but not least, the patterns are sent out to a few seamstresses as a “Beta” version to check for accuracy of design, fit, and construction methods.
If this sounds like a great amount of work, you are right! It is. But that is the care required to make sure a pattern is not only usable but also accurate to style and fit. My patterns are not something quickly thrown together, or slapped on paper. Through years of working in the industry and the way we were trained in design, this is the way I learned to take garments from concept to completion.
In industry, much of this can be accomplished with the aid of a CAD (computer-aided design) system. But for me, lacking a fancy computer system, the patterns are done the “old-fashioned way” by hand.
A lot is happening behind the scenes here at Ecclesiastical Sewing, and as more church vestment patterns are completed, you will be the first to know! Once the vestment patterns are ready, I will give you an update on how the finished garments turn out. Yes, photos will be coming as well. Once the pattern projects wrap up, it is time to get back to some sewing. So stay connected with Ecclesiastical Sewing!
Solo Dei Gloria
Be sure to visit our online store front Ecclesiastical Sewing where you may shop for Liturgical Fabrics, altar linen fabrics, church vestment-making patterns, liturgical machine embroidery designs, church vestment trims and notions and so much more. You may also find us on Ecclesiastical Sewing on Facebook, Twitter, and Pinterest. Sign up for our mailing list at the bottom of the page on our online store front and receive a free copy of our Small Linens Booklet as our way of saying thank you for following along.
References:
Kershaw, G. (2013). Pattern Making for Menswear. London: Laurence King Publishing.
Kopp, E., Vittorina, R., Zelin, B. & Gross, L. (1983). Designing Apparel Through the Flat Pattern. New York: Fairchild Publications.
Wolfe, M. (1982). Clear-Cut Pattern Making by the Flat Pattern Method. New York: John Wiley & Sons.
To learn more, or to find fabrics and supplies for making church vestments:
Be sure to visit our online store front Ecclesiastical Sewing where you may shop for Liturgical Fabrics, altar linen fabrics, church vestment-making patterns, liturgical machine embroidery designs, church vestment trims and notions and so much more. You may also find us on Ecclesiastical Sewing on Facebook, Twitter, and Pinterest. Sing up for our mailing list at the bottom of the page on our online store front and receive a free copy of our Small Linens Booklet as our way of saying thank you for following along.
What is a Monastic Style Chasuble?
Monastic Chasuble Pattern for Making Church Vestments
Monastic Chasuble Pattern
The Origins and History of the Alb
What is a Tippet: Church Vestments
Traditional Linen Alb Priest Vestment Sewing Pattern


 RSS - Posts
You must be logged in to post a comment.