Challenges with Goldwork Embroidery
Challenges with Goldwork Embroidery
It often does not take long to realize when a battle ensues and there will be no winning. So it goes sometimes when a new Ecclesiastical Embroidery Project first starts. Add in goldwork embroidery and problems can magnify in a hurry with the result of challenges with Goldwork embroidery.
A few weeks ago, the IHS Ecclesiastical Embroidery design was started. Things seemed to be moving along wonderfully. The silk was stretched on the frame, the pattern had been pounced and traced, and stitching was underway. It seemed like the project would move along nicely, as the work was couching gold threads on the surface. The brick stitching on the project was going well. Very well that is ………..until it was time to plunge. Then disaster struck, or rather, should I say stuck. Yes, that’s right. Stuck – not going anywhere, being stubborn, stuck. No amount of pulling, tugging, piercing, or tweaking could get those gold threads to cooperate and easily plunge the way they should to the back side. Oh, there were a few stubborn ones that did eventually surrender and made the plunge. There were several that would absolutely not give in and remained steadfastly un-plunged.
Plunging Goldwork Threads
Now yes, one might be wondering, “Did she try the lasso method? Was the large-eyed needle method tried? Yes and yes again. I was getting stumped. This is not the first time, the second, or even the third time of plunging goldwork threads. There was no “pop” as the thread went through. What could be the problem? The plunging hole was pierced with my The Best Laying Tool which was doubling as an awl. The gold thread went through the first layer and was almost through the linen, but a quick flip-over revealed the problem. The muslin backing! Yes, that was the hangup. No doubt about it. The layers of fabric were catching the goldwork thread. The thread proved too thick, especially when doubled and pulled through all three layers.
And now what to do? The simple answer was: Start Over. Unstitch, remove the layer of muslin, and start over. Here is a quick photo update on the restart. And, it may turn out for the better in the end.
Starting Over
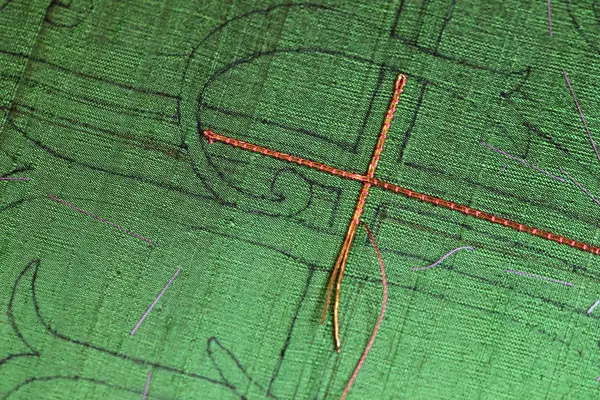
The silk dupioni has been basted to the Alba Maxima Linen, restretched on the frame, and ah……..yes, the couching stitches can begin! Starting over can have its advantages. It allows for corrections, adjustments, and changes in the plan or order of stitching. The center of the cross was an area of concern, so, a quick review of the A to Z Goldwork book sorted that all out. It seemed like a better idea to start at the center and work my way out to the end.
Tackling Corners
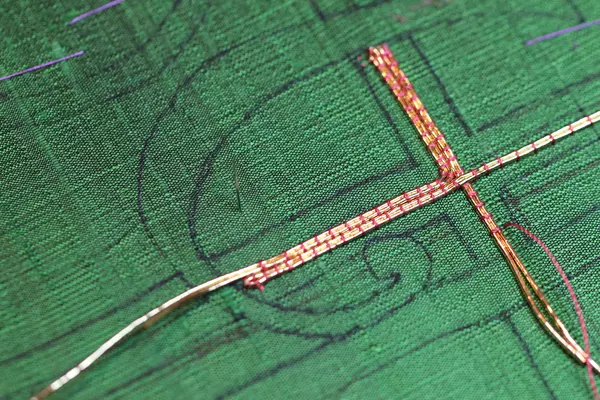
Once again the first stitches are underway. The gold threads have not yet been plunged, but there will be a few more gold threads taking turns at some ends to cut down on the plunging. Let’s keep our fingers crossed that it goes better this time!
And speaking of next time, I think the project will start over with a felt ground…………and more research on goldwork designs from some of my collection of vintage books.
Solo Dei Gloria
Be sure to visit our online store front Ecclesiastical Sewing where you may shop for Liturgical Fabrics, altar linen fabrics, church vestment-making patterns, liturgical machine embroidery designs, church vestment trims and notions and so much more. You may also find us on Ecclesiastical Sewing on Facebook, Twitter, and Pinterest. Sign up for our mailing list at the bottom of the page on our online store front and receive a free copy of our Small Linens Booklet as our way of saying thank you for following along.
Imitation Japanese Goldwork Embroidery Threads
Ecclesiastical Embroidery Designs A Starting Point
Church Vestment Fringe: is there a difference?
Easter Sunrise Hand Embroidery Design
Long Awaited Threads
Goldwork Embroidery and Meandering Thoughts


 RSS - Posts
You must be logged in to post a comment.